For a local game, go to the file menu and click on open. The following screen will appear. 
1
Uncheck this box to start a local game. You will notice that the field for the access code will be disabled.
2
Enter the number of the game you want to play.
3
Click on the "Ok" button the continue.
Once you clicked on "Ok" the following window will show. This window allows you to specify the settings of the game.
1
Enter the names of the teams in these fields. The home team in 1a and the visiting team in 1b.
2
Enter the number of the teams in these fields. The home team in 2a and the visiting team in 2b. Fill in this field as correctly as possible.
3
These buttons are used for choosing a image (logo) that represents the team on the scoreboard. This field is optional and only useful if you are using the scoreboard. For the home team use 3a and for the visiting team use 3b.
4a
Here you can choose one of the settings sets. These settings are the ones used for the Royal Belgian Ice Hockey Federation competition games.
4b
Once you selected a set of settings this button will become active. When clicked all the fields in 7 are filled in automatically. This doesn't mean the loaded settings are permanent. You can load another set or just edit the settings in 7.
4c
This field shows extra information about the settings that will be loaded.
5
Enter the location of the game into this field.
6
Enter the date and time the game is planned to start into this field.
7
Enter the requested settings into this field. These settings can be loaded with 4a-c. Any changes you make in these fields have to be re-entered every time you load the game.
8
Once everything is filled in correctly the button will become active. Click the "Ok" button to continue.
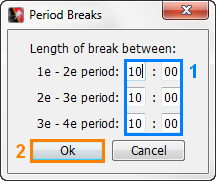 Once you clicked the "Ok" button the following dialog will show. In this window you have to enter the length of the breaks between every period.
1
Fill in the length of each break.
2
Click the "Ok" button to continue.